I made glycerol stocks of the yeast that started the entire D2O adaptation experiment, and now that I may have a D2O adapted strain I made another glycerol stock for safeguarding. I used the protocol found here for reference, with the exception that I doubled the recipe.
Tag Archives: equipment
Shotgun DNA Mapping Buffers
I worked with Pranav to make some H2O and D2O buffers for the shotgun DNA mapping experiment. We use a buffer that we call Popping Buffer for our tethering experiment. The name comes from the fact that this buffer was used during Koch’s (and potentially others’) experiments that involved “popping” bound proteins off DNA while unzipping. The buffer is (final concentration):
- 50mM NaCl
- 50mM Sodium Phosphate (which is a mixture of dibasic and monobasic sodium phosphate)
- 10mM EDTA
- 0.02% Tween-20
We made two 100ml amounts of solution in D2O and H2O respectively. And the buffers were concocted from separately made solutions in each water type:
- 4M NaCl was made as a solution in both D2O and H2O
- 500mM Sodium Phosphate (monobasic) in D2O and H2O
- 500mM Sodium Phosphate (dibasic) in D2O and H2O
- 100mM EDTA in D2O and H2O
From some Popping Buffer we made BGB (Blotting Grade Blocker) in both D2O and H2O at a concentration of 5mg/ml (about 15ml volume). And we also made aliquots of anti-dig in PBS (from only H2O, since we aliquot 20ul amounts and then add 180ul of Popping buffer when it is experiment time).
Thermo PCR Sprint (“ThermoCycler”) Programmed T vs Recorded T
This experiment is a follow up to yesterday’s experimental results. Instead of trying to program the ThermoCycler by guessing, I decided to record the temperatures of various different T settings. Basically I would pick a T and try to get the recorded value near the T’s needed for the pALS PCR protocol.
I put the machine in manual mode so I can change the T when I needed to and I would take data points at 30 seconds for melting and annealing temperatures and at 30s and 5 minutes for extending T. This is how long I would be doing that step during the PCR reaction so it seemed to make sense. Below is a chart of the Set T and the recorded T at each interval.
Below that is the data of the recorded T.

PCR Sprint Programmed T vs Recorded T. Anthony Salvagno. figshare.
Retrieved 18:51, Aug 23, 2012 (GMT)
http://dx.doi.org/10.6084/m9.figshare.94414
Testing the pcr machines
Today is going to be dedicated to getting temperature readings from the PCR machines (both OpenPCR and the ThermoCycler). Both machines have their own temperature output, but in the past I’ve discovered that they don’t really reflect the temp inside the PCR reaction tube (especially with regards to the ThermoCycler). The last time I did this with the ThermoCycler, I got some interesting results which led to my current program settings.
Today I’m going to repeat that experiment and replicate it with OpenPCR. Here is my setup:
- You will need:
- a PCR machine
- reaction tubes
- a thermocouple – These are pretty easy to find
- a temperature reader – I’ve used digital multimeters in the past, but for this experiment I’m using the TC-48-20 OEM because it comes with software that takes frequent measurements and allows me to export the data.
- Take a PCR reaction tube and drill a small hole in it
- Put either water or mineral oil in the tube (in the amount that you normally use for PCR reactions), I’m doing 50ul for this experiment.
- Put the thermocouple in the tube through the drilled hole and place the tube in the block on the PCR machine.
- Connect the thermocouple to your temperature reader (in my case I need to connect the temp probe to the TC-48-20 and then connect that to my computer)
- Run the PCR program and collect data.
Check out the images below:


Need to get anti-dig
I have some anti-dig in our -80C Freezer and I’ve discovered that it is almost 3 years old. This probably isn’t that big a deal, but since I’m starting from scratch I would have let it slide if it was a year old. It’s not. So this will be ordered today.
The real reason I wrote this notebook entry was partly to declare that I’m ordering new anti-dig, but also because I was super stoked that I googled “anti-dig openwetware” and the notebook entry I linked above was the #1 hit. It’s good to know that my old notebook and new one are both making an impact in the scientific world.
This is what I’m ordering: Anti-dig
Shotgun DNA Mapping DNA Supplies
I had to do a bit of reorganizing. Since I’ve been reordering new supplies, I can easily get confused between what I need and what I don’t. So I’m conglomerating all the things that I do into one box and everything else will get shoveled away to be lost for all eternity. Here is a picture of the items that I need immediately and what they are:
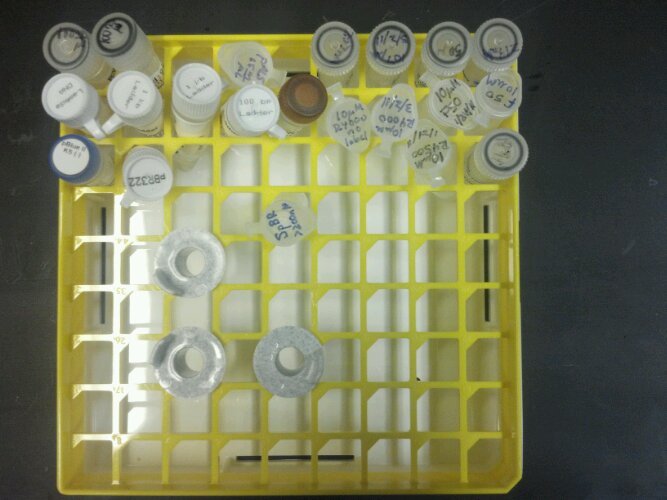
Row Two (from left): lambda DNA 500ug/ml, 1kb ladder, 1kb ladder, 100bp ladder, pUC19 100pg/ul, 10um R4000-no-label (2011), 10uM R4000 (2011), 10uM F50 (2011), 10uM F50-no-label (2011)
Row Three (from left): pBluescript II KS (-) 1ug/ml, pBR322 1mg/ml, 10uM R4500 (2011), 187uM R4500 (2011)
Row Four: SpBR >200nM
Update:
- Added Top Adapter (from IDT) – 530uM 8/13/2012
- Measured concentrations of pALS – pALS from 1/2011 is 96ng/ul; pALS from 8/2012 is 160ng/ul
Ordering the Oligos
I am placing an order for the oligos and primers needed for Shotgun DNA Mapping. Here are the sequences I’m going to order:
- F834-dig: 5′ – TTTTCCCAGTCACGACGTTG – 3′
- R2008-bio: 5′ – CACGTAAGGTTTCAGAGATATATGGG – 3′
- F50-bio: 5′ – TGTGTCGCCCTTAGGTACGAACT – 3′
- R4000-dig: 5′ – TTCGCTCCAAGCTGGGCTGTGTG – 3′
- Top Adapter: 5′ – Phos – GCTGTCTGAATTCTAATGTAGTATAGTAATCCGCTCATCG – 3′
- Bottom 1a:
- 5′ – GAGCGGATXACTATACTACATTAGAATTCAGAC – 3′, where X=dT-Biotin
- 5′ – biotin – GAGCGGATTACTATACTACATTAGAATTCAGAC – 3′
I’m ordering from Integrated DNA Technologies. I was going to order three different versions of the bottom adapter, but decided to just get the two listed above. The one I omitted from the order is the 5′-bio with the floppy overhang (which won’t ligate to anything). Once I get my second supply of money from IMSD I’ll order that oligo.
Shotgun DNA Mapping: Microspheres
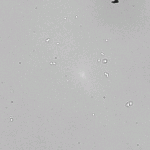
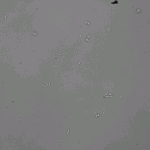
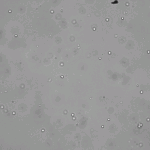
Today I need to buy microspheres. In the first experiments we used spheres with a diameter of 0.5um (or 500nm), and over time we eventually switched to using 1.0um beads. The reason is because: 1) big beads are easier to see if they are tethered or not, 2) you get better tweezer forces with the larger beads, and 3) the big beads clump less. The only drawback to using the larger beads is that there is a lot of repulsion between the beads and our glass surface so our DNA tethers need to be longer. I invented the 4kb pALS anchor to solve this very problem.
Here are some pictures of the different sized beads in the tethering environment:


And for completeness here are some old notebook entries regarding those pictures:
- DNA Tethering Experiments: 2/12, 2/15, 2/16
- Entry about the Small/Big bead sample
- Entry that talks about sonicating the beads
- Useful Protocols: Preparing the samples, preparing the beads
And here is a video that shows the tethering results of the DNA experiments listed above:
We want beads that are coated in streptavidin (or some form of avidin) because this molecule creates a very strong bond with biotin which is attached to our DNA for stretching/unzipping experiments.Most commonly, you can order beads with streptavidin, but some companies offer alternatives like avidin or neutravidin. In my experience neither works any better or worse than streptavidin. And in the case of these experiments the bond either holds or it doesn’t.
But believe it or not, it is hard to quantify the effectiveness of the beads. As you can see in the pictures above, both bead concentration and DNA concentration can affect tethering efficiency. And I have suspicions that the sonication process (what we do to prevent the beads from clumping) may affect the streptavidin in some way: in my head the vibration shakes off the molecules from the beads.
With all that said, there are places that I trust buying beads from. In the past I’ve purchased beads from Bangs Labs, Invitrogen, and Poly Sciences. I’ve never noticed that any bead from any company seems to work better than the rest. Because of this I think I’ll order a new stock of beads from Bangs because they pretty much only make beads (so they should do it the best). Note: I just remembered that Bangs, and Poly Sciences may be the same company and it turns out they are affiliated in some way. So I suppose there really is no difference between the two.
Update: I’m placing my order with Bangs Labs. I’m ordering 0.53um beads and 1.04um beads, both coated in streptavidin, and neither are fluorescent.
Ordering supplies for Shotgun DNA Mapping
Here is a list of components that are needed for this project:
- Anchor DNA:
- pRL574 – provided to us by Robert Landick
- pALS – purchased through DNA 2.0
- primers for both pRL574 and pALS
- F834-dig: 5′ – TTTTCCCAGTCACGACGTTG – 3′
- R2008-bio: 5′ – CACGTAAGGTTTCAGAGATATATGGG – 3′
- F50 (can order with or without Biotin): 5′ – TGTGTCGCCCTTAGGTACGAACT – 3′
- R4000 (can order with or without dig): 5′ – TTCGCTCCAAGCTGGGCTGTGTG – 3′
- Adapter DNA:
- Top Adapter: 5′ – GCTGTCTGAATTCTAATGTAGTATAGTAATCCGCTCATCG – 3′
- make sure the 5′ end is phosphorylated otherwise the ligation may fail
- Bottom 1a: 5′ – GAGCGGATXACTATACTACATTAGAATTCAGAC -3′
- X = dT-biotin
- Alternate versions of Bottom
- 5′ – TXTXTXAGAGCGGATTACTATACTACATTAGAATTCAGAC -3′
- X = dT-biotin
- 5′ – biotin – GAGCGGATTACTATACTACATTAGAATTCAGAC – 3′
- 5′ – TXTXTXAGAGCGGATTACTATACTACATTAGAATTCAGAC -3′
- Top Adapter: 5′ – GCTGTCTGAATTCTAATGTAGTATAGTAATCCGCTCATCG – 3′
- Molecular Biology Components
- PCR Supplies:
- Taq/OneTaq – I had amazing success with OneTaq so I may get this
- dNTPs
- MgCl2
- PCR buffer
- Digestion components
- BstXI
- SapI
- EarI
- Ligation
- T4 DNA Ligase
- Gel Components
- EtBr
- SybrSafe
- PCR Supplies:
The unzipping adapter sequences
Every time I order adapter sequences, I need to go through the same process. This page lists all the sequences used for the unzipping construct’s adapter duplex. The issue is that I only ever need two sequences: a top and a bottom. The top adapter is easy to pick, but the bottom adapter has two possible solutions and I always forget which one. For this I’ll need to reference some order forms to see what I used last time.
Anyways. The top adapter I need is:
- Top Adapter BstXI/SapI – this adapter has the complementary overhangs for both the BstXI site on the anchor DNA and the SapI site on the unzipping DNA.
And it looks like the bottom adapter I need is the one labeled Bottom Adapter 1a. I’m guessing it is that because: (1) the top adapter on the page is shown annealed to this bottom, and (2) I reference it on this page.
Ok, I’ve verified that the bottom adapter I use most frequently is:
- Bottom Adapter 1a – which I’ve most recently developed two versions of:
- GAGCGGATXACTATACTACATTAGAATTCAGAC – this is the original sequence, and the X is actually a dT-biotin (dT is deoxyribonucleotide thymine)
- TXTXTXAGAGCGGATTACTATACTACATTAGAATTCAGAC – Bottom Adapter 5′ biotin, floppy named because the TXTXTXA is an addition to the 5′ end of the original sequence. The X’s are dT-biotin
- GAGCGGATTACTATACTACATTAGAATTCAGAC – Bottom 5′-biotin adapter named because I’ve removed the dT-biotin and put the biotin at the 5′ end of the sequence.
So unfortunately the verification process I went through is not open. I had to pull my order forms to Alpha DNA to confirm the sequences. Once I found and confirmed the sequences I emailed them to myself. And now I’m posting them here so the entire record is complete. ONS rules!
Anyway, I never remember what Bottom Adapter 1b is for, but I suppose it is not necessary. In the mean time I found a bunch of older notebook entries that contain information about the bottom adapters:
- 11/4/09
- BstXI adapter – I made an adapter to ligate the anchor to itself, and I reference the original bottom adapter called Bottom biotin. I don’t say which one it is, but I’m pretty sure it’s 1a.
I had some other links, but they were either confusing or referred to the bottom adapter without specifying each one. And it is tough searching OWW for the CATG version (1b). Maybe Koch knows? I’ll do some digging later. Research is fun!