We were running low on Drierite (we use the indicating variety) in the lab, which is a desiccant, and so I ordered some more. Fairly straight forward.
In my search for the stuff we currently use I came across this page talking about regenerating the dessicant. This would have been awesome to know a few years ago, as someone has been throwing out old dessicant. In the case of our indicating drierite, the chips turn from blue to pink, so the pink chips end up discarded.
I decided to order more because I didn’t want to deal with leaving chemicals that are in the desiccator in there for an extended period of time without desiccating material.
Anyways if you (like me) are too lazy to click the link that talks about desiccant regeneration then read below for the drierite protocol:
For the regeneration of Indicating DRIERITE and small lots of Regular DRIERITE , the granules may be spread in layers one granule deep and heated for 1 hour at 210° C or 425° F. The regenerated material should be placed in the the original glass or metal container and sealed while hot. The color of the Indicating DRIERITE may become less distinct on successive regenerations due to the migration of the indicator into the interior of the granule and sublimation of the indicator.
Note: I’m creating a new notebook category for stuff like this, that has little to do with my research but could be vital one day for future students in the KochLab. I am cleverly calling it “KochLab Stuff.”
In the lab we have a Barnstead EasyPure RoDI water filtration system sold by Thermo Scientific (see experiment product list). The prefilter and UV lamp have expired and I bought the necessary parts to replace it. If you’ve lost your manual for the machine and don’t want to wait the two days to talk to Thermo Tech Support (electronically) then the part numbers for these pieces are: Prefilter (D50246) and UV Lamp (LMX13). I bought mine from VWR for quite a pretty penny (~$300 for both pieces).
Anyway the installation is pretty simple and straightforward, but I’ll walk you through it anyways.
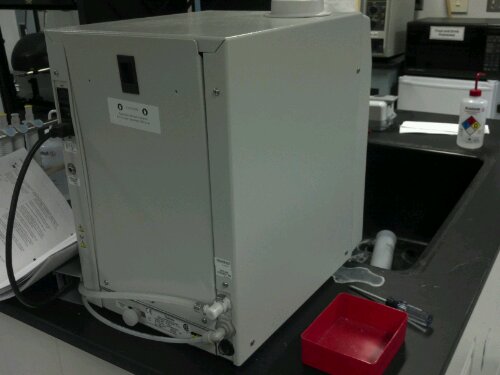
Above is a picture of the back and side of the filtration system. The back panel contains the filter cartridges, and the UV lamp is accessed by removing the casing from the sides and back. In the above image you can see 3 screws on the side and 4 on the back around the rim. These need to be removed to get to the UV lamp. The black latch on the back needs to be pulled down to open the rear hatch.
Before you remove the screws make sure the machine is off and disconnect the power supply and the water feed lines. These are supposed to be a quick connect system but there was nothing quick about it for me. Eventually I gave up on removing one of them.
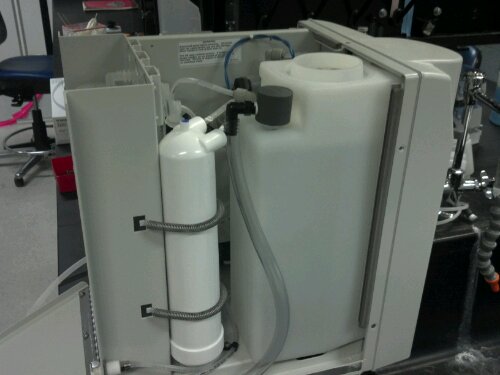
Once you get the top off, this is what you should see inside the device. The UV lamp is behind the water tank. Just follow the blue wires.
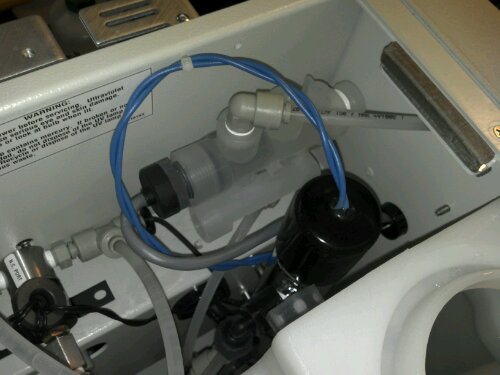
There it is. The lamp is enclosed in a metal cylinder. So gently pull on the black rubber cap to pull out the lamp. The cap protects the plug that attaches the wires to the lamp, so be gentle here. The lamp should come out quite easily, but the wires aren’t long enough to pull the lamp out all the way so you first have to remove the plug.
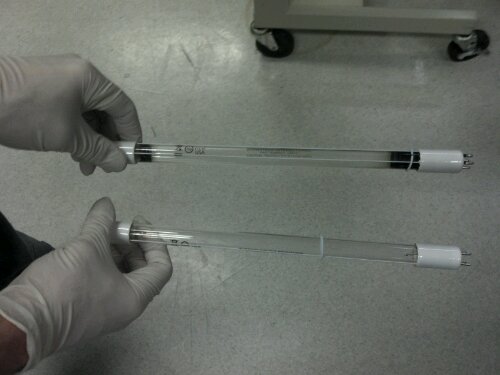
Slide the black cap back along the wires so you can see the plug and wiggle the plug until it detaches from the lamp.The plug does not remove easily, so be gentle but forceful. Once you get the plug off you can fully remove the lamp from the cylinder. Check out the difference between the new lamp and the old one below:
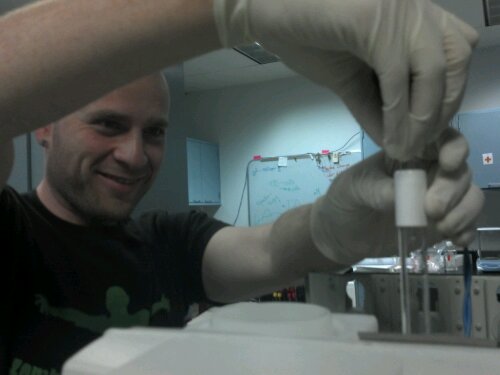
Yuck right! Now slide the new lamp into the cylinder about halfway and put the plug back on it. Again it is a snug fit so be gentle and strong. Also it is worth noting that according to the manual the slightest bit of perspiration and finger prints can ruin the lamp performance so wear lint free gloves.
Why the hell am I smiling? This isn't fun...
If you get anything on the lamp (like I did because I didn’t read the instructions, you see kids this is what happens when you don’t follow the rules…) you can use isopropanol and a fiber free cloth (kim wipes work well) to clean the lamp.
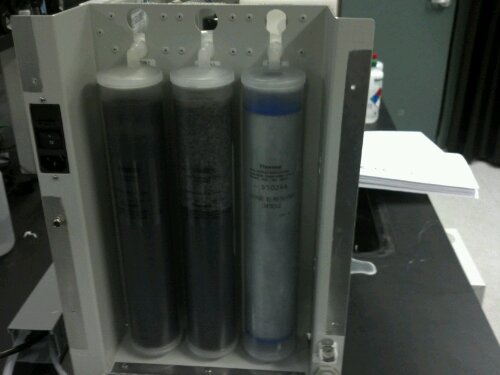
Now let’s get at the prefilter. Since the top is off, the access is easier because the back panel isn’t latched onto anything. There are 3 cartridges in here all designed for easy removal. The one on the far right is the RO Prefilter.
According to the manual, this filter is designed for easy removal. WRONG! In principle you just slide the cartridge up and out, but the fittings are all really snug and taking this thing in and out isn’t an easy task. First pull it up so hard you are sure you are going to break something. Once it pops up you should be able to move it up to a keyhole type thing. From there pull it out so hard your arms come out from their sockets. If your shoulders give before the gasket you’ve done it right!
Then take your new prefilter and put it back in reverse order. Only instead of pulling this time you push. And you push so hard it feels like you are going to give birth. And I’m pretty sure I did!
When that is all in and snug you are done! Well sorta, you need to reset the RO prefilter timer. First put everything back the way you found it (reconnect hoses, plug in machine, put top on). Hold down the flush button and turn on the machine. When you see “reset RO” press Start/Stop and when you see “—” press it again. Then you are done with that.
Next you should see -d1 (or something like that) and press Start/Stop to start the machine and get it to do it’s filtering goodness. Now you are done!
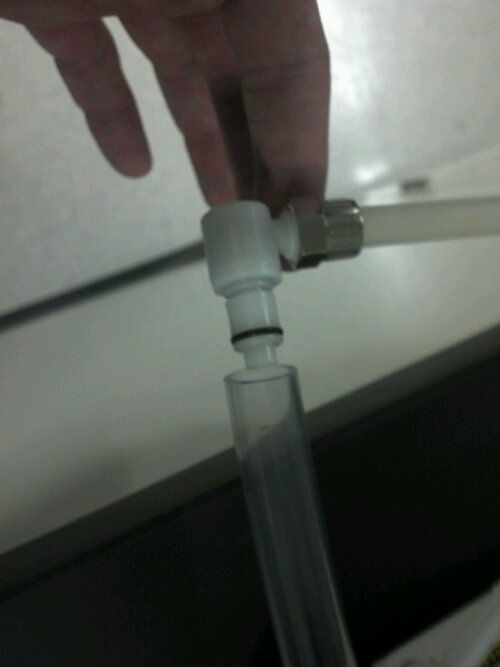
Aside: I didn’t pay attention to which fitting the water feed in line connected to. There are three “ports” on the back of the machine. The top is water in, the middle is water out, and the bottom is an overflow line for the tank. I spent about an hour trying to put the water in line into the overflow port. Not fun. Below is a picture of a connection that is too small for a hose.
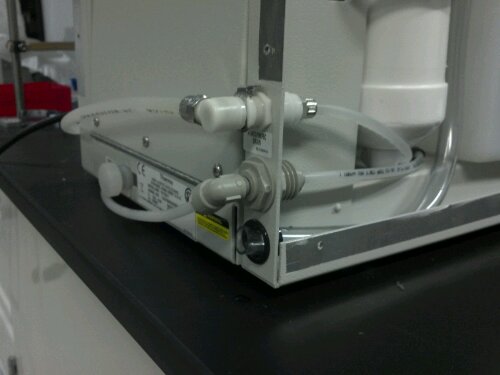
And below that is how it’s supposed to look, so don’t try and do what I did. (I ended up calling tech support and while they were little to no help, I managed to figure out the problem).
So I hope this helps you if you have a little trouble trying to figure out this machine, lost your manual, or something else. If it didn’t then I’m sorry you spent so much time reading something so useless to you, but hey that’s not my fault.
Now I can begin the Repeating Crumley Water experiment and get going on the E. coli growth experiments! Yay!
For those of us who are self hosted we have to worry about archiving and protecting our notebook data. WordPress (along with other CMS software) in particular is constantly evolving and you may install a bad update or you may tinker with the code and disrupt a process. You may even get hacked which may destroy your system. While these are some doomsday scenarios there are in fact many reasons why you should backup your notebook and infinitely more reasons that are unknown.
Lucky for us WordPress has a great tutorial system and is widely documented on the web, so backing up is a breeze. You can do this manually or automatically depending on your preference. I chose to do it manually since I didn’t have time to setup an autoschedule. WordPress needed an upgrade and I wanted to get a backup of my posts just in case.
My site is hosted by Bluehost and as such I’m able to follow the general protocol for using the cPanel and phpMyAdmin. The cPanel is a nice GUI for accessing server software, scripts, calls, etc. Instead of needing to understand command line prompts to interface with the server, you just point and click! phpMyAdmin is similar but for databases. cPanel gets you to the phpMyAdmin software and from there you can look at the back end of your databases. I don’t know much about this yet (but my dad knows a ton and so I’ll be picking his brain a lot).
But I do know that from phpMyAdmin it is very easy to get to the wordpress database. Once I got there I just clicked export database and away it goes, right to my computer.
I also needed to download the entire IheartAnthony site, because downloading the database doesn’t download images and other media which in my case are essential to my notebook. Doing this was easy. In cPanel there is an icon that takes you to the Bluehost backups (they host their own backups of everyone’s site just in case) and you can download the last nightly, weekly, or monthly backup. I opted for the most current so that I would have all of the most up to date information.
If you want to know, my site is 3GB which took a considerable amount of time.
So now I have my notebook backed up and I want to know what to do with it. It would be beneficial to have backups in more than one location and currently I can have 2: one on the KochLab server and one on my home machine (and I guess one more on my work laptop which is where I have the one right now). I would also like to have this notebook archived in the WayBack Machine for access to it in the future if I’m dead or the notebook is no longer active (or deleted). In fact this should be a priority for all open notebooks, since data curation is a major question mark right now.
Also, should I make a copy of my backup open? I’m inclined to think yes because when you are open everything should be open, but I don’t know about what possible ramifications I should be aware of. Any ideas? If this is a viable option, should I throw the copy up on GitHub?
If you don’t want to look at pictures of gradual change every day then you can just come back to this spreadsheet to see the numbers change and then you can look to see what days something new happened and find the corresponding images through the blog. If I remember to, I may link blog posts with activity to the day number in the spreadsheet, which would be a great idea (but like I said, if I remember).
Update: slide all the way over to the right to see links to the image notes from this notebook corresponding to that day.
Update 2: I added the original Crumley Data on a separate sheet, and I began plotting the percent germination in real time. Currently I’m not sure how to label each line in Google Spreadsheets. I can’t find a way to do it, but I’ll mention it here:
Blue – DI water
Red – 33% D2O
Orange – 66% D2O
Green – 99.9% D2O
Purple – DDW
Not shown – di water, no seeds
BTW: It took me a while to figure out how to do this because Google Docs changed their appearance and formatting yet again. In order to embed a Google Doc in the new format there is a “Collaborate” menu along with the usual “File, Edit, etc” menus. No longer can you go to the “Share” button and select “Publish as web page” because that button has been removed (it is not just the original share button that let’s you set documents as public and determine who you want to share with).
The image then gets converted to a standard size (1024 x 768 px) for embedding in the galleries that you see. The gallery will contain a thumbnail version and if clicked will take you to the compressed version. If you right click this image you can select “View Image” from the dropdown: From here you will be taken to a url like this:
If you want to look at the original image (for instance in the case of all my high-res seed pictures) then you just need to truncate the extension to get something like this:
And as an aside I had to find a way to display syntax in the blog. First I tried Syntax Highlighter Compress, but that didn’t work and so then I learned that WordPress plugins are called using shortcode syntax which led me to Show Shortcode. Using this plugin is just the shortcode:
[showshortcode][/showshortcode]
And you place your shortcode in between the tags.
Note: The use of shortcodes is very much like coding in HTML except in some cases (like the Mindmeister plugin) no closing tag is needed.
This blog is hosted by wordpress, but the comments are hosted by Disqus (which hosts the comments of The Randomly Grad Life). I’ve set the comments so that anyone can comment without having to login to Disqus, but it should be known that Disqus is a commenting system that is rapidly growing all over the web so it may be worth your time to signup for a FREE account. I’ve also set it up so that if you have an OpenID, Google, Yahoo, or Facebook account you can login with those accounts as well.
My understanding is that you can receive notifications through those outlets for comments and replies to comments. I know it works with Google and Disqus, but I’ve never tried the other accounts. Play around and let me know what you discover, and most importantly figure out what works best for you. Let’s communicate!