How to seal the analyslides

So after the evaporation experiments from the past couple of weeks, I decided to go with the DOW vacuum grease as my sealant. Mostly because it is designed (supposedly) to be resistant to leaks and nonreactive with water, 2 major concerns regarding this project. I’m trusting the manufacturer and the performance of the product in the experiments on this one.

Lid and Slide.

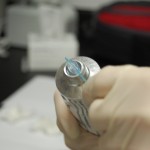
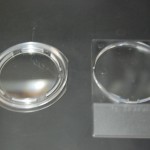
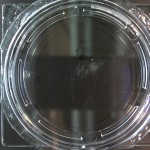
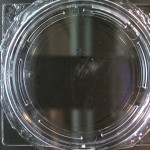
The analyslide has a lid and a base. The base has a circle on it with a slight gap (near the frosted part of the slide), which I’m pretty sure is what helps air escape (creating a decent vacuum) when putting the lid on the base. The top actually has two concentric circles. The inside one is perforated and aligns inside the circle on the base, while the larger circle on the top closes just around the outside of the circle on the base. Since there is no gasket or o-ring in the assembly, the seal isn’t ideal when dealing with water so further measures need to be taken.

Pressing the edges to ensure a tight seal.

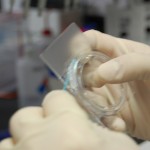
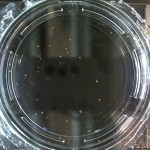
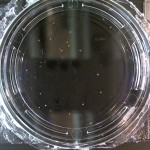
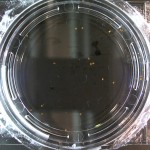
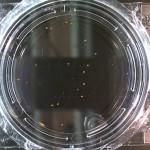
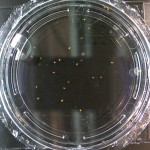
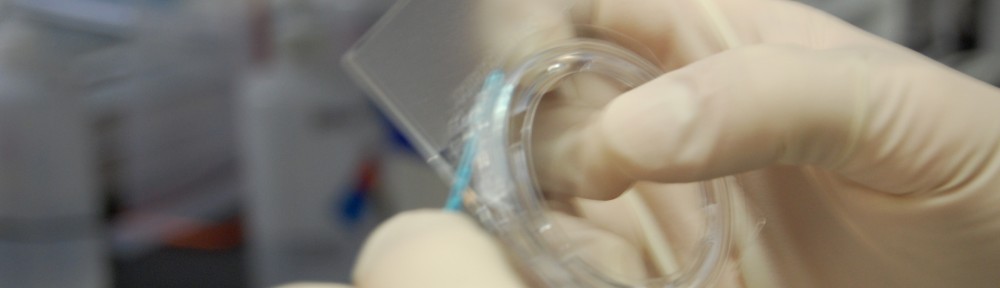
After placing the lid on the base, I press the two together. I make sure to keep the analyslide verticle with the frosted side up (unlike what I’m demonstrating to the right). When there is water in the sample the air bubble that remains will align with the hole in the circle on the base of the slide. Doing this prevents water leakage when pressing the lid and base together. I ensure that I press firmly around the entire edge and evenly.

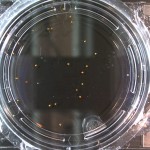
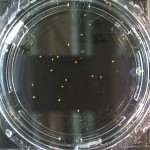
It is also in this step that one must be cautious. When there are seeds in the sample, they tend to float until water has soaked the seed coat. Because of surface interactions that are beyond my understanding at this time, the seeds also move around the surface and tend to migrate towards the edges. When placing the lid on, seeds may end up under the perforated circle or on the top of the base circle. This causes them to be crushed which could cause even more airflow into and out of the sample (because of the added thickness of the seeds).

Innoculating loop that I use to spread my sealant (vacuum grease) over the potential leak spots on the analyslide.

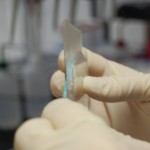
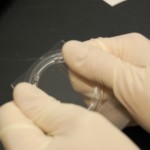
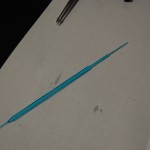
Once the lid is placed on the base, you need to seal the chamber. Previously I used a q-tip because the handle was just the right thickness to fit between the lip on the lid and the base. I eventually switched to a plastic gamma sterilized innoculating loop given to me by a neighboring lab (thanks Nathan!). The loop is a little thinner than the q-tip and I feel allows me better control over sealant application. When sealing, I actually don’t use the loop part at all, and rather use the other end (smearer?) but I’ll still refer to it as the loop for this explanation.

The sealant must be spread evenly over the gap caused by the top-slide interface.

I get a relatively large (but thin) amount on the end of the loop and spread it around the lid-base interface. I make sure to get the majority of the sealant near the gap between the two to ensure a proper seal. Pay extra attention when applying near the sides of the base, because here the lid protrudes a bit and so the sealant must actually be placed near the underside of the slide.

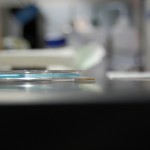
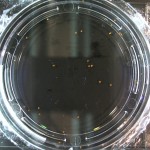
For your viewing pleasure, I am including all the pictures I took (that aren’t too blurry) for this demonstration. I’d like to thank Nadia Fernandez Oropeza for help in taking the images you see here.

How Much D2O is in Natural Water? UPDATED

Update: I realized that I was off by a factor of 10 in my calculation for the amount of D2O to add to DDW. It turns out that the amount you need to add is 0.14ul of D2O per 1mL of water, which is vastly different from 1.4ul.

I was hoping to start the third attempt at the “Effects of DDW on Tobacco Seeds” experiment but got caught up doing some “trivial” calculations. It’s hard to do trivial things when you haven’t done math in a while. Why was I trying to do these calculations?

Well it occurred to me that perhaps the root hairs we saw weren’t a product of there being no D2O in water, it could have been as simple as thinking there was nothing at all in the DDW besides H2O. Perhaps this water is so pure that the plants are looking for something in the water and the hairs are a byproduct of that.

So I thought, what if I added enough D2O to the DDW so that it has the same amount of D2O as naturally occurring water. This way the only real difference between the ddw sample and the di water sample is how the waters were purified. Maybe the Thermo purifier water we have actually has trace amounts of something in it and this is why the hairs aren’t as prominent.

In order to set that up, I needed to know how much D2O is in natural water. The short answer turned out to be 156ppm (parts per million) D2O in H2O according to some standard from ocean water. And according to my calculations results in a concentration of 7.8mM, which is quite a staggeringly large number coming from a molecular biology background. Steve put it best in this blog post:

0.03% does sound trivial.  But the way I look at it, biology has somehow evolved to make use of different divalent cations in much lower concentration, such as magnesium, zinc, calcium, etc.  And it can distinguish between potassium (K+) and sodium (Na+).  How much more different are K+ and Na+ from each other, compared to the difference between D and H?

So 7.8mM would translate to about .14ul of “pure” D2O in 1mL of “pure” deuterium depleted water. Of course we don’t have pure of either of those. We have 99.9% pure D2O (99.9 atom % D according to the bottle) and < 1ppm D2O in deuterium depleted water.

Now I became stressed! Can I assume that those amounts are so trivial in 1.4ul of D2O that I don’t need to worry about adjusting the calculations? Well I ran some other numbers to make sure.

99.9% pure D2O is roughly 1000ppm H2O (assuming H2O is the contaminate in the bottle), roughly 10x more concentrated than the amount of D2O in natural water. It turned out the concentration of H2O in my D2O was around 55mM. So in 0.2ul of D2O there would be ~2nl of H2O. An extra 2nl of H2O in 1.999ml of D2O is not much change at all.

What about the amount of D2O in the DDW? Well 1ppm turns out to be about 10nM which equates to about 0.9nl in 1mL of DDW. Again less than 1nl won’t affect (too much) the 0.2ul that I’m already adding. Instead of there being 2ul it will be 2.001ul. I think I can live with that!

Unless I come to the realization that all these numbers are important. If that’s the case then I’ll go back through and figure out exact amounts to add to offset the potential impurities in both solutions. Yay for me!

RC3: Day1

Here is the results after 24 hours. I haven’t looked in detail yet, but it’s interesting to note that there are 2 seeds in the 66% d2o in di water sample that appear to have sprouted already.

Also for those counting along with me, the final counts won’t be out of 30. When I seal the chamber I end up crushing 1-3 seeds in the process and a couple more end up in the outer fringes where it is tough to discern sprouting or not. So I will count up the seeds in the interior circle (the fragmented one) and count the seeds that sprout from that total.

RC3: Live Results

For those counting along with me, the final counts won’t be out of 30. When I seal the chamber I end up crushing 1-3 seeds in the process and a couple more end up in the outer fringes where it is tough to discern sprouting or not. So I will count up the seeds in the interior circle (the fragmented one) and count the seeds that sprout from that total.

Repeating Crumley 3: The Setup

It’s a new day and that means a new Crumley Trial. This is the 3rd try and hopefully one of the last trials (if everything goes smoothly). As always, I’m looking to repeat the results Crumley got back in 1960 growing tobacco seeds in D2O. Only I’m doing it better (no disrespect to Crumley, but there were some flaws in the original setup).

After getting the results of the water evaporation experiment I decided to go with the DOW Corning Vacuum Grease to seal the chambers. The product claims it has low reactivity with water and provides a great seal (according to my results). Since I want as little interaction with water as possible this seems like a viable option. With that said, let’s move on to the setup.

I prepared 8 samples for this trial using a combination of DI water, DDW, and D2O. I’m using Cuban Havana 2000 seeds from the Tobacco Seed Co (because the idea of growing Cuban cigar seeds in the lab sounds awesome!).

  1. I counted 30 seeds per sample and placed them on weigh paper for addition to the samples after the water step (see below). Using weigh paper helped considerably when dealing with the static attraction the seeds tend to have.
  2. 1 set of seeds (unknown amount) was placed in 8mL of DI water and left to presoak for 30 min. The water from this sample would be used as a control to monitor fungal and mold growth.
  3. I placed the seeds aside and prepared the water for the samples. The 8 samples include: (1)di water (no seeds), (2) di water, (3) 33% d2o in di water(2mL d2o, 4mL di water), (4) 66% d2o in di water, (5) 99.9% pure d2o, (6) 33% d2o in ddw, (7) 66% d2o in ddw, and (8) 99.9% pure ddw.
  4. 6mL of each water type was added to an analyslide (see Experiment Product page at top). The presorted seeds were then added to the water. The analyslides were then closed and sealed with Dow Corning Vacuum Grease.
  5. For the control sample, seeds were removed before closing and sealing the chamber.

Sealing the chambers is quite a task that I have turned into an art. When I put the analyslide cover on I put it on loosely at first. Then I tilt it vertically so the air bubble moves toward the slight opening at the top. I begin to press around the edges with my thumbs until it is closed completely. Finally I spread vacuum grease around the rim (at first with the no cotton end of a long qtip, but then I used some plastic innoculating loops we had because it was thinner) for the final seal.

I will provide a post on the sealing process later today or tomorrow depending on who can show up to take pictures of me doing this.

RC3: Day 0

And away we go with trial 3! I expect this version to go much better now that the lab temperature is regulated. Setup coming tomorrow when I have internet again.

My First Open Notebook Science Lecture!

Koch was participating in a panel about Open Science something or other (to be edited when he reads this and corrects me) and asked me to fill in for him for his Junior Lab class. I (liking to take on more than I can handle) said yes and away we went.

He asked if I could discuss my notebook, talking about the technical details about WordPress and the plugins that it offers. He also asked that I talk a little bit about my science and why it was so interesting. I took it from there.

I admit that I did very little preparation. I jot down some ideas about where I wanted to lead the discussion. Typically when I speak, I prefer there to be more discussion then just one person lecturing for 50 minutes (and Koch likes it that way too). So I started class with the question “What are some of the biggest obstacles of open notebook science, and how can you think of overcoming them?” From there I let the students discuss amongst themselves for about 5 minutes and then we conversed.

Of course the major response was the fear of being scooped. Another response was potential funding issues. We actually didn’t get much into others because I wanted to talk about what people usually tell me what they are afraid of and how I counter the argument.

I started with Jean Claude Bradley’s line, “Most scientists are too busy with their own work to steal someone else’s.” Which I believe is very true. Think about this, a lab has a bunch of equipment and experiments. All of which are very time intensive and costly. If you tell them a great idea, they would have to invest all sorts of other time and money to pick up your idea. They would ruin the investment that they put into their own experiments which is not only disheartening, but also likely to displease your funding agency (because you aren’t doing what you promised to do!).

Then we talked about the potential hazards with funding. I told the students about our own positive experiences with potential funding agencies and how the most positive feedback from grants is aimed at the aspect of open notebook science and open science in general.

During the group work I heard students mention positive aspects like transparency in data and results, which was really good to hear that there isn’t as much fear about the unknown as I’m used to hearing amongst my peers.

I then moved the discussion to different open notebooks. I told them that I have tried basically everything, and they all work in their own way. For me it all came down to organization and search indexed.

I explained how wikis and OpenWetWare specifically is great for a lot of things (easy to use, customizable, etc), but that it fails in one key aspect: organization. If you don’t keep track of what you do on a wiki then it will be lost forever.

On the flip side I explained that I had used Google Docs to fix the organizational aspect, but then found out that it failed in another way: search indexed. Google Docs for some reason don’t show up in Google search results which means no one can find your content (which to me defeats the whole purpose of an open notebook).

I then explained how I moved on to WordPress by donating my personal website for the pursuit of science. We discussed the major positives for using WordPress: developer friendly, easy to use, organized, search indexed, customizable, site analytics, and commenting.

Eventually I ran out of time because there is a lot that I could talk about, and wanted to talk about. Hopefully I’ll get another chance. If I do I would talk about the real world results I’ve been getting because of the notebook: network connections I’ve made, the modern impact factor because of social networking, experimental feedback, etc.

I think most effectively I could do a series of talks (maybe two or three) that highlight open notebook science. The first would be an intro to ONS: what it is, what people are afraid of, the benefits, the drawbacks, etc. The second would be a how to: available tools, what is required in a notebook. And maybe a third would be what being an open notebook scientist has done for me, basically a bunch of anecdotes and case studies (from experience) of how ONS has influenced my career.

I think with more organization something like that would be very helpful to the young scientific community both here at UNM and anyway over the world (webcast!).

Water Evaporation: Midpoint Discussion

So here I am at the midpoint of this experiment. Already the sample that was sealed with parafilm is completely evaporated. The sample with the o-ring is nearly empty. Meanwhile, the sample with no seal is doing really well. I’m guessing the parafilm somehow ruined the seal of the analyslide but in the case of the o-ring sample I’m thinking I didn’t seal that as well as I could have.

With that said, the rubber band is holding up particularly well. Obviously the greases (both vacuums and the vaseline) should seal well, and the glue gun as well. I will set up an experiment with a number of rubber band samples and see if they seal well over the next 8 days or so (once this experiment is complete). If they all do about the same then I will try to repeat the Crumley experiment with rubber bands as the seals. If not then I will just stick with vaseline or the DOW Corning vacuum grease.

Also it should be noted that I’m experiencing some issues with the slideshows I setup to track each sample change. On my home laptop (Macbook Pro, using Chrome) I don’t notice an issue, but here in the lab (Windows XP, using Firefox) not all the slideshows load completely (for me). And it is always the same slideshows that have the issue. If anyone else experiences this problem please let me know. Also of note, WordPress itself isn’t functioning properly so I’m guessing it is a Firefox issue and only on this computer.

Water Evaporation From Analyslide: Setup

I noticed an issue with the water evaporation rate from the sample chambers after the first trial. At first it wasn’t so bad, but got progressively worse. When the second trial came there was a heat wave in the lab (chiller went down for a week), and the evaporation rate increased. I discarded the results anyways because the heat affected the seed growth, but the evaporation rate would have ruined the experiment regardless.

profile of the analyslide, the lid and slide meet on the top side of the slide

Now I’m investigating the best way to seal the chamber while affecting the sample as little as possible. This is important because deuterium/hydrogen exchange could be a major source of experimental error and right now I have no real way of measuring this effect so it may be best to avoid it at all costs. I have purchased/selected sealants based on this. Also, based on the figure to the left, you can see it isn’t very easy to fit many things into that gap created by the top and bottom of the analyslide. The space there is 1/8″ so whatever I use has to either mold to the shape or be small. That is why I chose the following sealants:

sealants

I filled 8 samples with exactly 6mL of DI water. I place the tops of the analyslides carefully on the slide portions and pushed them together slowly so as not to spill any water. I put pressure only on the walls and not the middle of the sample. I then put each sealant around the rim of the analyslide. For the vaseline, Krytox, and DOW Grease I used the giant q-tip seen in the picture to the left to spread the sealant around the area where the lid and the slide meet. For the o-ring and the rubber band I used a clean forceps to move the rubber over the same area. The glue gun glue filled the area between the lip on the top and the slide quite easily. For the parafilm, I cut a small strip (slightly larger than 1/8″ and stretched and wrapped it around the opening. I used to strips in hopes of ensuring a decent seal.

I chose these sealants for various reasons. I was looking for non-reactive “liquids” or suitable solids that could present the least amount of contact/transfer with water. Vaseline, Krytox, and DOW are all nonreactive (maybe not the Vaseline) and hydrophobic. Parafilm is waxy as well but is also a suitable solid. The rubber band and the o-ring were solid enough that I could place them wherever I wanted. The glue gun had the benefit of being a liquid at one point and a solid after cooling.

I was worried that the glue gun would heat the sample considerably but that wasn’t that big a deal. There was some sample heating but it wasn’t very much (although I didn’t measure the exact amount), and the glue cooled quickly.

My guess is the greases and the vaseline will work the best, but they are all the messiest. I don’t think the o-ring will work at all because it never seemed to make contact with the proper edges of the sample. But I have a feeling the rubber band may work well enough.

The experiment results can be seen “live” here.